In forex and binary options trading, recognizing overbought and oversold zones is crucial for quickly identifying potential price reversals. Most traders rely on the RSI indicator for this purpose. However, the RSI's slow nature can cause delays in signal generation. This can be frustrating, especially when you need to react quickly to market movements.
So, what if there was a way to receive faster and more frequent alerts? The answer lies in the Stochastic indicator.
This article explores a swing trading strategy that utilizes the Stochastic indicator to capture short-term swing signals within the market. But before diving into the strategy, let's gain a deeper understanding of the Stochastic indicator itself.
The revised article maintains the original flow of information while making it easier to read and understand. Additionally, I've incorporated relevant keywords like "forex trading," "binary options," "price reversals," and "Stochastic indicator" to enhance its discoverability for users searching for related topics.
What is the indicator "STOCHASTIC"?
The "STOCHASTIC" indicator is a short-term momentum indicator similar to the RSI indicator. The basis of the hand "STOCHASTIC" is to compare the closing of price flows with the highest and the closing of the lowest price during a specific period. So, if you choose the "STOCHASTIC" indicator with 10 periods then it will be seen where the current candle is around the last 10 candles. The hand "STOCHASTIC" has two different lines, for more details see the figure below.
 |
| Stochastic indicator |
The basis of STOCHASTIC is to compare the closing price with the highest (high) and lowest (low) prices in a certain period. Take for example, if you use a 10 period STOCHASTIC, then this indicator will display the position of the current candle (price bar) in relation to the previous 10 candles.
The uniqueness of STOCHASTIC lies in the two lines it displays (see image). Let's discuss in more detail how these two lines work and the interpretation in the next section!
 |
| Stochastic indicator lines |
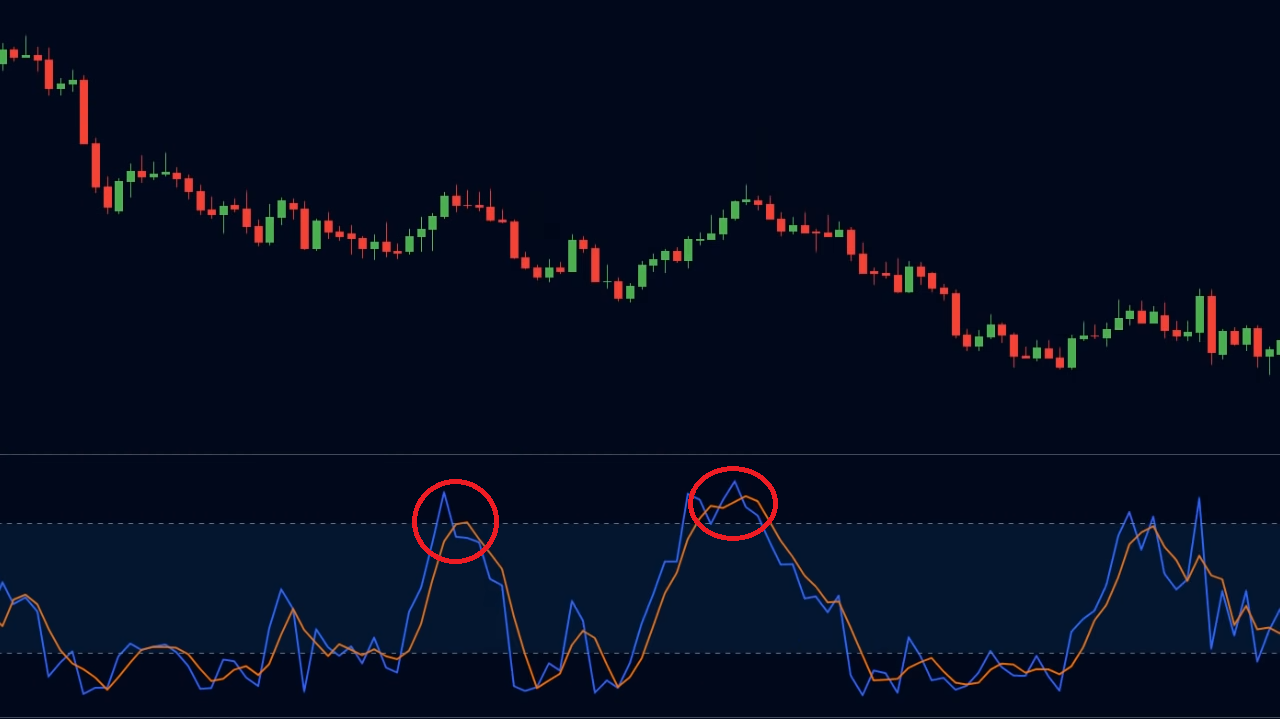
The blue line is the line that actually shows you the true value of the "STOCHASTIC" indicator. While the oren-colored line as above is just a three-period moving average of the blue line. In this case, not a few traders like to use the crossing of these lines to determine the entry and exit points in their strategy, such as the moment of crossing shown in the picture below.
In addition to the two lines, we also marked the zone in the middle of the indicator from level 80 to level 20 as shown below.
 |
| Retracement zone |
As with the RSI indicator, the "STOCHASTIC" indicator is also used to identify overbought and oversold zones. When "STOCHASTIC" is above level 80, it is considered to have entered the overbought area. Here We expect the price to fall in the short term. And vice versa. So a good strategy is to sell when "STOCHASTIC" is overbought, and buy when it is oversold.
That strategy may sound good in theory, but in reality, the price in the market does not always comply with overbought and oversold conditions. For example, in a strong uptrend "STOCHASTIC" may remain overbought for a long time without the downtrend, just as in a downtrend "STOCHASTIC" may remain oversold for a long time without any upside. This is only because "STOCHASTIC" is a fast indicator, in contrast to the RSI indicator.
"You need to know that fast indicators are prone to false signals, while slow indicators are against late signals".
How to avoid false signals in making trades?
How to avoid false signals when trading is actually quite simple, trade in the direction of the primary trend. Jad, if the price is an uptrend, we are only looking for "BUY" opportunities. This opportunity will occur when "STOCHASTIC" is below level 20. like the example below.
Similarly, when in a downtrend we are just looking for a "SELL" opportunity. When "STOCHASTIC" overbought above level 80.
We will ignore oversold signals at any time in a downtrend. An example is the image below.
PROPER ENTRY AND EXIT RULES USING THE "STOCHASTIC" INDICATOR
In the "swing trading" strategy, we basically want to catch a short-term market swing that is going on for three to five days. In this case, we only buy low and sell high in "swing trading". Since this is "swing trading", we will use the daily timeframes to conduct market analysis. This strategy focuses on identifying short-term fullbacks in the existing trend and entering at the end of the fullback. In other words, it is a trend-following strategy that tries to enter the trend on the fullback.
To enter on the fullback, the first thing we have to do is, We need to identify the exit of the stinging trend. To do this is to use two moving averages. The MA indicator is a simple indicator to help you in identifying market trends. Gukana EMA with period 21, and EMA exponential with a period of 50.
 |
| EMA 21 & EMA 50 |
The picture above the yellow line is the EMA with a period of 21, and the red line is the EMA of the 50 periods. From the picture We see the trend is going up, We see that the EMA 21 is above the EMA 50 and the moving averages are sloping upwards. Another characteristic of moving averages is that they act as dynamic levels of support and resistance in a trending market.
For example, in an uptrend, We see that the area between the 21st and 50th EMAs acts as support many times in the same way. We will use this characteristic and combine it with the "STOCHASTIC" indicator for proper market entry and exit.
RULES OF BUYING AND SELLING
"BUY" rules
For the "BUY" rule We see the price in an uptrend. In an uptrend we want the EMA 21 to be above the EMA 50, and we want both EMAs to tilt upwards.
Next, We wait for the price to pull back to the area between the EMA 21 and the EMA 50. In this case, We will call it a retracement zone.
As soon as the price reaches this zone We need the "STOCHASTIC" indicator to be oversold at the same time. for example, as shown below.
This will be a strong signal, the reason is We see when the price pulls back towards the retracement zone We know that in an uptrend the price may find support in the EMA, and may move upwards. In addition, We also see that "STOCHASTIC" is oversold. Oversold in an existing uptrend further confirms the fullback may end and the price may be heading higher. So we have confirmation from the EMA and "STOCHASTIC" that the fullback has ended and the price is ready to move.
Now, all we need is signals to enter and exit. For this, we use the "STOCHASTIC" cross between the orange line and the blue line. Remember We are telling you that traders use these crosses to generate "buy and sell" signals. When the blue line crosses above the orange line it is a buy signal, and vice versa.
"SELL" rules
The "sell here is We are waiting for the price to retreat to the retracement zone.
On the candle above We see that the price pulls back to the retracement zone. So, according to MA the price finds resistance on the MA and moves lower. But you need to look at the indicator "STOCHASTIC" to confirm this. On "STOCHASTIC" We see that the indigo "STOCHASTIC" is above 80 on the candle. This means that "STOCHASTIC" is currently overbought, and we may expect a sell-off of the price.
By understanding STOCHASTIC, you can:
- Identifying overbought (assets too high) and oversold (assets too low) conditions
- Look for trading entry and exit opportunities
- Confirm trading signals from other indicators
Interested in learning more? Stay tuned to our article for an in-depth discussion of how the STOCHASTIC indicator works and is used in trading!


Post a Comment for "Identify Price Reversals Faster with the Stochastic Indicator in Swing Trading"